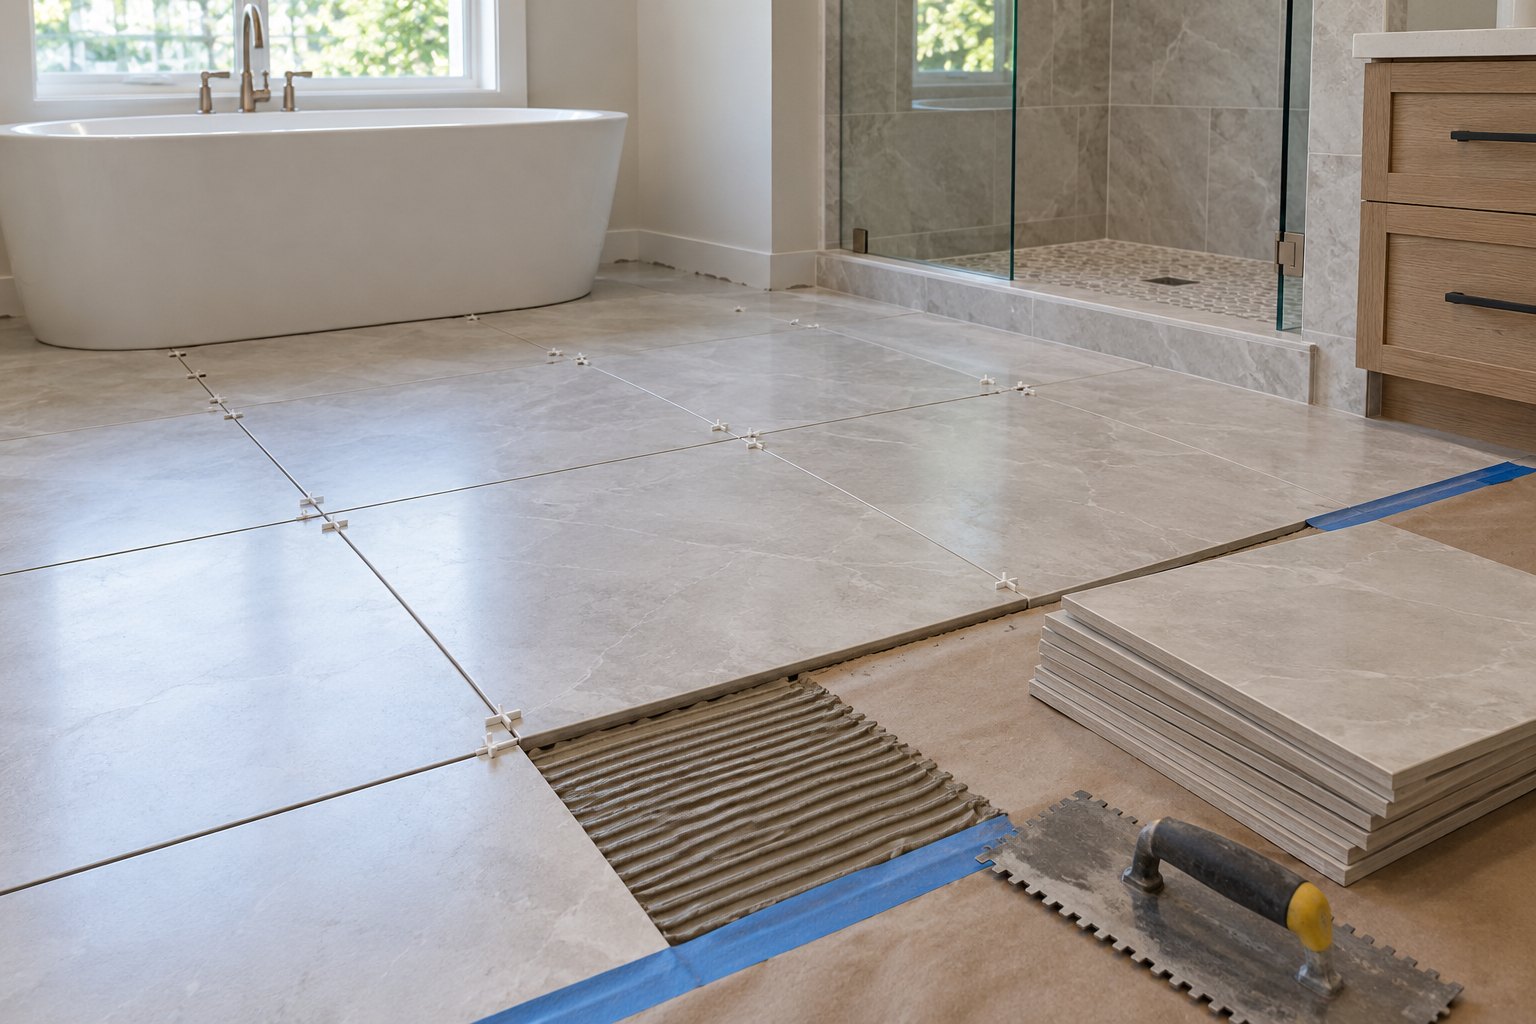
A flat, stable surface and careful layout help tile look good and perform well.
Start with the problem you want to solve
That sounds straightforward until a quote has to turn it into measurements, materials, access and a finished result. Before comparing solutions, write down what you see today and what you want to be different after the work. Include the rooms or outdoor areas affected, when the issue appears, and whether another repair has already been attempted.
For this project, pay particular attention to waterproofing, plumbing locations, ventilation, storage, lighting and the order of custom finishes. Those details affect where the work begins and ends. A photo gives useful context, but a close inspection can reveal a different cause or a condition that changes the approach. Keep observations separate from assumptions: “water collects after heavy rain” is more useful than deciding in advance that one particular product must be installed.
Decide which results matter most to your household. You may care about long-term durability, easier maintenance, appearance, an urgent repair, or keeping disruption short. Rank these priorities before choosing finishes. It is easier to compare written scopes when each contractor is solving the same problem and working toward the same finish.
Record dimensions where you can do so safely, then take wide photos and close views. Include adjacent doors, windows, drains, outlets, steps, landscaping and the route materials will take through the property. Measurements from a homeowner are a useful starting point; final quantities and site conditions still need confirmation before ordering or construction.
Assess what is underneath
Check whether the floor or wall has movement, water damage or uneven areas. The appropriate substrate and preparation depend on the location and tile selected.
This step connects the starting condition with plan visible lines. Ask how the existing condition will be checked and what must be completed before the next trade or stage starts. A sequence matters because later finishes can conceal earlier work. If the condition changes once materials are removed, pause to document it and agree on the revised scope before covering it.
Walk through the details at the actual site. Consider where materials can be staged, what access is available, how the work will affect nearby surfaces, and how the area will be protected. The answer can vary between two houses on the same street. An estimate that names the assumptions is more helpful than one that simply lists a finished product.
Ask which materials and installation method are proposed for assess what is underneath. Confirm the product or system, any preparation it needs, and what a suitable finished surface should look like. Manufacturer instructions, site conditions and applicable requirements should guide technical details. If a particular finish, dimension or feature is essential, put it in writing rather than relying on a verbal description.
It also helps to agree on what is outside this stage. Removal, disposal, repairs behind an exposed surface, related electrical or plumbing work, paint, trim and cleanup are often separate decisions. A clear boundary prevents a small omission from becoming a surprise after work starts.
Before moving forward, photograph the condition and write down the decision you made. If several options exist, ask what would change in cost, schedule and maintenance for each. The least expensive initial option is not automatically the best fit if it leaves plan visible lines unresolved.
Plan visible lines
Discuss grout joint width, pattern, cut locations, corners, transitions and edge trim. Large format tile can make a wavy substrate more obvious, so preparation often takes more work than expected.
This step connects assess what is underneath with clarify wet-area details. Ask how the existing condition will be checked and what must be completed before the next trade or stage starts. A sequence matters because later finishes can conceal earlier work. If the condition changes once materials are removed, pause to document it and agree on the revised scope before covering it.
Walk through the details at the actual site. Consider where materials can be staged, what access is available, how the work will affect nearby surfaces, and how the area will be protected. The answer can vary between two houses on the same street. An estimate that names the assumptions is more helpful than one that simply lists a finished product.
Ask which materials and installation method are proposed for plan visible lines. Confirm the product or system, any preparation it needs, and what a suitable finished surface should look like. Manufacturer instructions, site conditions and applicable requirements should guide technical details. If a particular finish, dimension or feature is essential, put it in writing rather than relying on a verbal description.
It also helps to agree on what is outside this stage. Removal, disposal, repairs behind an exposed surface, related electrical or plumbing work, paint, trim and cleanup are often separate decisions. A clear boundary prevents a small omission from becoming a surprise after work starts.
Before moving forward, photograph the condition and write down the decision you made. If several options exist, ask what would change in cost, schedule and maintenance for each. The least expensive initial option is not automatically the best fit if it leaves clarify wet-area details unresolved.
Clarify wet-area details
Shower tile requires a complete waterproofing approach beneath it. Ask how penetrations and transitions are treated and how the chosen tile, grout and movement details suit the room.
This step connects plan visible lines with the finished result. Ask how the existing condition will be checked and what must be completed before the next trade or stage starts. A sequence matters because later finishes can conceal earlier work. If the condition changes once materials are removed, pause to document it and agree on the revised scope before covering it.
Walk through the details at the actual site. Consider where materials can be staged, what access is available, how the work will affect nearby surfaces, and how the area will be protected. The answer can vary between two houses on the same street. An estimate that names the assumptions is more helpful than one that simply lists a finished product.
Ask which materials and installation method are proposed for clarify wet-area details. Confirm the product or system, any preparation it needs, and what a suitable finished surface should look like. Manufacturer instructions, site conditions and applicable requirements should guide technical details. If a particular finish, dimension or feature is essential, put it in writing rather than relying on a verbal description.
It also helps to agree on what is outside this stage. Removal, disposal, repairs behind an exposed surface, related electrical or plumbing work, paint, trim and cleanup are often separate decisions. A clear boundary prevents a small omission from becoming a surprise after work starts.
Before moving forward, photograph the condition and write down the decision you made. If several options exist, ask what would change in cost, schedule and maintenance for each. The least expensive initial option is not automatically the best fit if it leaves the finished result unresolved.
How to compare the scope and estimate
Ask each contractor to describe the same outcome for your tile installation. A meaningful estimate should identify the work area, what will be removed, what new materials or preparation are included, who handles disposal and what the area will look like when the crew leaves. A single total can be useful, but it cannot explain why two proposals differ.
Look for allowances and provisional items. If a finish or fixture has not been selected, determine what amount is included and whether labour to install it is included too. Check whether the price assumes the existing framing, substrate, soil or services are sound. Clarify how a hidden problem will be shown to you, priced and approved before extra work proceeds.
Ask about the schedule in stages rather than only the first day and final day. Material lead times, inspections, weather, curing or drying can create gaps when little appears to happen. Discuss where tools and debris will go, access to the property, parking, protection, noise and whether part of the home will be unusable.
A written change process is especially valuable in renovation work. Have the scope describe how additions or substitutions will be documented and who approves the cost. Keep a copy of the agreed selections, drawings and estimate together. If you change your mind later, refer back to that record so everyone understands the effect on the timeline and total.
Questions to ask before work begins
What is the main condition that could change the approach to your tile installation? How will it be checked? What evidence would suggest a different repair is needed? These questions help distinguish a symptom from its cause and leave room for a sensible adjustment after the site is opened.
Which measurements and selections must be confirmed first? Who supplies each material? When is the last practical point to change a colour, size or layout without delaying the next stage? Ask to see samples in the setting where they will be used, particularly when surrounding finishes affect the choice.
What protection, removal, disposal and final cleanup are included? What happens to adjacent finishes if they are disturbed? Ask whether the estimate includes patching, caulking, trim, paint or landscape restoration. These small boundaries often matter as much to the homeowner as the central installation.
Who performs specialized work when it is needed, and what approvals or inspections apply to this exact project? Requirements vary by scope and location, so confirm them for the property rather than assuming every similar-looking job is treated the same. Ask how the completed work and any product information will be handed over.
While the work is underway
Keep a short record of decisions and changes. Photos before demolition, during exposed work and at completion can help explain concealed details later. They also make conversations more precise if the existing condition differs from the first estimate.
Check the work against the agreed scope at natural milestones. For your tile installation, that may mean reviewing preparation before it is covered, confirming layout before permanent installation and inspecting transitions before the area is put back into use. Raise a concern while the relevant stage is visible; it is usually easier to discuss then.
Give materials and assemblies the time their instructions require. Paint, grout, concrete, soil and waterproofing systems do not all become ready for normal use the moment the crew leaves. Ask for clear care instructions, including when you can walk on, wash, load or otherwise use the completed area.
At the end, walk the site together. Check operation where appropriate, surface finish, edges, debris removal and any items still outstanding. Record those items and the agreed follow-up. Keep receipts, product names and relevant care documents with your home records.
Common mistakes to avoid
Do not select a solution solely from a photograph of a similar project. Two properties can look alike while differing in waterproofing, plumbing locations, ventilation, storage, lighting and the order of custom finishes. A product or method that works in one setting may be unsuitable in another. Use examples as a design reference, then verify the actual site.
Avoid comparing only the final price when the proposed work is different. One estimate may include demolition and disposal while another assumes the owner handles them; one may include repair of adjacent finishes and another may end at installation. Request the missing details so the comparison is fair.
Do not cover a visible warning sign simply to improve appearance. Dampness, movement, rot, damaged wiring or a recurring leak should be investigated. The right next step depends on the cause, and sometimes a specialist assessment is appropriate before deciding on finish materials.
Leave room for ordinary maintenance. Access to equipment, drainage routes, cleanable surfaces and replaceable components can matter years after installation. Ask what you will need to inspect and maintain, then make sure the layout allows you to do it.
A practical planning checklist
Write down the current issue and the outcome you want. Photograph the entire work area and the close details. Measure the area and mark any constraints you know about. Note past leaks, repairs or unusual conditions, even if they do not seem directly related to your tile installation.
List your must-haves separately from choices you could change. Gather inspiration for the appearance, but also identify the practical features that matter: access, drainage, durability, comfort or ease of cleaning. Decide who will choose and purchase each finish.
Review the written scope for removal, preparation, materials, installation, related trades, disposal, protection and final restoration. Confirm the schedule assumptions, payment milestones and method for approving changes. Keep the final version where you can refer to it during the job.
Before signing off, ask for any care instructions and walk through the finished area. Keep a short list of follow-up items. Planning is not about predicting every hidden condition; it is about making decisions and responsibilities clear enough to respond well when conditions change.
Final thought
The best result starts with a clear understanding of the existing condition and a written plan for your tile installation. Use the questions above to discuss the property with a contractor, check assumptions and choose a scope that addresses the real issue. The details will always depend on your home, materials and intended use.
RW Contracting works with Ottawa area homeowners on renovations, outdoor projects and repairs. Share the location, a few photos and what you hope to achieve to start a conversation about the appropriate next step.
Frequently asked questions
Can a photo replace an on-site assessment?
Photos help explain the issue and can guide an initial conversation. They may not show what is behind a surface, beneath a floor or underground. A site visit is often needed to verify measurements, access, materials and the cause of damage before settling the final scope.
What should I do if hidden damage is found?
Ask for photos and an explanation of what was uncovered. Review the repair options, cost and schedule effect in writing. Agree on the change before the extra work is completed, and keep the record with the original estimate.
General planning information for Ottawa area homeowners. Site conditions and applicable requirements determine the right approach.